Blog
Machine Translation Report
What is the optimal MT Engine for you? Find out in the latest MT Report by Memsource.
Do you regularly assign multiple Linguists or Vendors to routine jobs? Are they often the same providers working on jobs with the same or similar language combinations?
Previously, when it came to assigning Linguists, you would need to assign each Linguist to each workflow step individually for every target language, which was pretty time-consuming, especially for projects with multiple target languages and workflow steps. Now, instead of selecting providers manually, you can assign them from a template in just a few clicks.
This is particularly useful for translation Vendors who receive regular projects from clients and need to assign Linguists quickly.
How to Assign Providers from a Template
-
Create a project template, unless you already have a project template saved. Any existing project can be saved as a template using the Save as button on the project detail page, but linguists need to be saved to a template manually. See the Project Template section of the Memsource Cloud User Manual for more information.
-
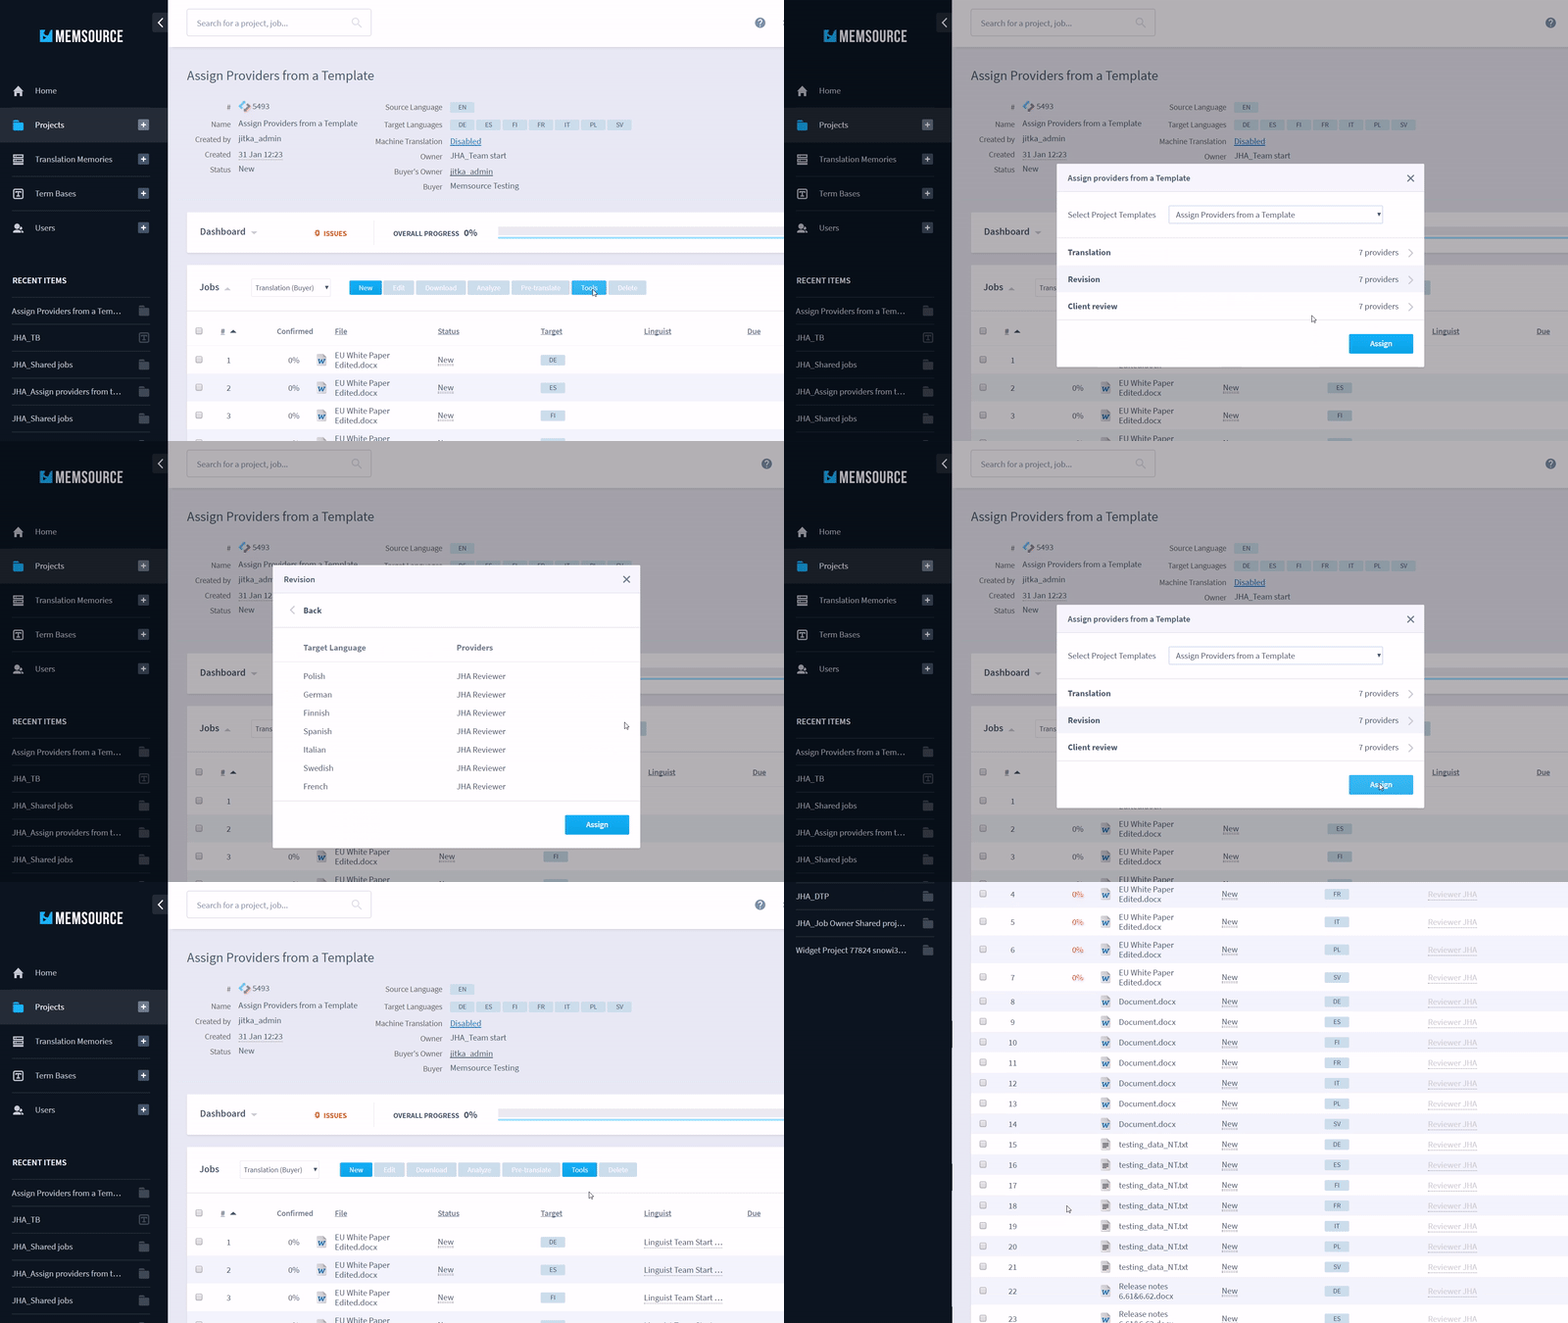
Start assigning providers to your project. It is possible to assign providers in different ways. You may want to assign all providers at once or assign them to specific jobs. This is explained under the Tools section of this Help Center article. The Assign Providers from a Template option is available in the Tools menu on the project detail page.
-
Select a project template from the drop-down list. It is important to note that the number of workflow steps and the source language in your chosen project template must match those in your new project, if not the project template will not appear in the list. The target languages can be different, but at least one of the target languages must be the same.
If you can’t see the project template you want to use in the list, you will need to edit the project template so the workflow steps and source language match those in the new project. To find out how, see this article in our Help Center.
-
Review the providers in each workflow step by clicking on the arrows next to the number of providers.
-
Click Assign, when you are happy that everything has been assigned correctly. You can review the providers assigned to each of the workflow steps by selecting each workflow step in turn from the drop-down list in the Jobs section of the project detail page.


